What a one-car and two-car shop actually need
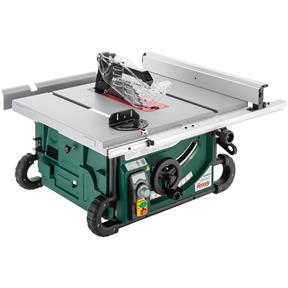
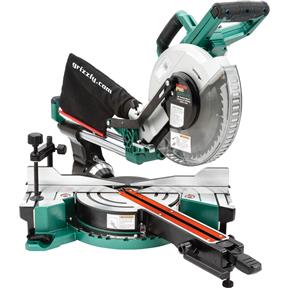
A one-car garage gives you roughly 12 by 20 feet of floor, and once a car or a storage rack takes its share you are working in about half of it. That is enough for a bench along one wall, a benchtop table saw on a mobile base, a miter saw station, and a compressor tucked into a corner. It is not enough for a full cabinet saw with outfeed space unless the car lives outside.
A two-car garage, around 20 by 20 feet, is where a real shop becomes possible with the car still inside on bad nights. You can dedicate one bay to a fixed layout: a hybrid or cabinet saw with room for a sheet of plywood to pass through, a long bench, and a dust collector on the wall. The cost difference between the two is mostly wiring length, lighting count and the larger tool footprint, not the tools themselves.
Before you buy anything, run the electrical question first, because it decides which tools you can own. A benchtop saw runs on a normal 120V circuit. A 3 HP cabinet saw, a larger dust collector or a big compressor wants a dedicated 240V circuit, and that circuit is the single most expensive line in the whole project. Price it with our electrical panel upgrade cost calculator before you commit to a tool tier.
Shopping the sale? See Black Friday DIY tool deals for the tools worth watching.
| Item | One-car garage | Two-car garage |
|---|---|---|
| Typical floor area | 240 to 300 sq ft | 400 to 600 sq ft |
| Usable shop area with a car inside | About half | About one bay |
| Best saw tier | Benchtop, on a mobile base | Benchtop, hybrid or cabinet |
| Outlets and circuits | 2 to 4 on 20 amp | 4 to 8 on 20 amp, plus 240V |
| Lighting fixtures | 4 to 6 four-foot LED strips | 8 to 12 four-foot LED strips |
Stage 1: Electrical, the subpanel and the 240V circuit
Most garages were wired for a door opener and a few outlets, often on a single shared 15 amp circuit. A table saw, a dust collector and a compressor starting at the same moment will trip it. The fix is a subpanel: a small breaker panel fed from your main panel, which gives the shop its own circuits and room to grow.
Costs depend on distance to the main panel, the amperage you need and whether the main panel has capacity to feed the new one. If the main panel is full or undersized, the real project becomes a panel upgrade, which is why the calculator page matters before the first purchase. This is licensed-electrician work in nearly every jurisdiction and it needs a permit and an inspection. Do not treat it as a DIY savings line.
The 240V circuit is a separate line item from the subpanel. It is a dedicated two-pole breaker, heavier gauge wire and a receptacle matched to the tool. If you are also thinking about an electric vehicle, the same run of wire often serves both, so read the EV charger installation cost calculator before you pay an electrician to run it twice.
| Work | Low | High | Labor share |
|---|---|---|---|
| Four to six new 20 amp outlets on one circuit | $350 | $1,100 | About 60 percent |
| 60 amp subpanel in an attached garage | $1,200 | $3,000 | About 55 percent |
| 100 amp subpanel with long wire run | $2,000 | $4,500 | About 55 percent |
| Dedicated 240V circuit for a stationary tool | $500 | $1,500 | About 60 percent |
| Permit and inspection | $75 | $400 | Fees only |
| Main panel upgrade, if the main panel cannot feed a subpanel | $1,800 | $4,500 | About 50 percent |
Stage 2: Lighting
Garage lighting is where small money makes the biggest difference. A single bulb in the door opener is not shop lighting. The standard approach is rows of four-foot LED strips on the ceiling, wired to a switch, with task lighting at the bench and at each machine. Shadows cause more mistakes than most people expect, and a table saw cut is a poor place to find that out.
A one-car garage generally wants four to six strips, a two-car garage eight to twelve. LED strips are cheap and many plug in, so the cost is mostly labor if you want them hard-wired, and almost none if you hang them from hooks. A magnetic gooseneck LED at the bench and at the vise is the cheapest upgrade in the whole shop. For the surface under it, the epoxy garage floor cost calculator is worth a look, because a bright coated floor reflects light and makes the lighting go further.
| Work | Low | High | Notes |
|---|---|---|---|
| One-car: plug-in LED strips, no electrician | $80 | $300 | Hang from hooks |
| One-car: hard-wired LED strips on a switch | $350 | $900 | Labor is most of it |
| Two-car: hard-wired LED strips on a switch | $600 | $1,500 | Add a second switch leg |
| Task lights at bench and machines | $40 | $250 | Magnetic gooseneck units |
Stage 3: The workbench and storage
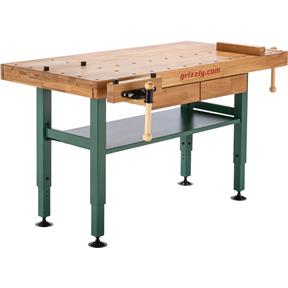
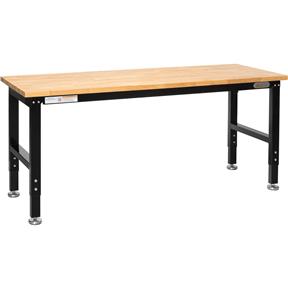
The bench is the one tool you touch for every project, so it earns its budget first. A good bench is heavy, flat, at the right height for you, and has power at hand. Grizzly sells a heavy-duty oak bench with steel legs (T10157) for a fixed, immovable work surface, and a 6 ft adjustable workbench with built-in outlets (T34011) when you want to change height between assembly and detail work. The Amazon picks in the gear section below pair with each one.
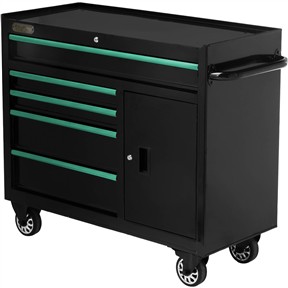
Storage follows the bench. A 42 in tool chest (T34658) over a 42 in roller cabinet (T34659) holds the hand tools and small power tools that otherwise live in boxes on the floor. Roller storage matters in a one-car garage because the cabinet can move out of the way when the car comes in. If you are insulating or finishing the walls to hang storage from, price it with the insulation installation cost calculator and the drywall installation cost calculator first, since both change what you can mount where.
- Entry bench tier: a basic fixed bench from either retailer, enough for assembly and hand-tool work.
- Step up: an adjustable-height bench with built-in outlets, so power is within reach of the vise and the clamps.
- Pro: a heavy oak top on steel legs, the kind of bench that does not walk across the floor under a mallet.
Stage 4: Dust and air
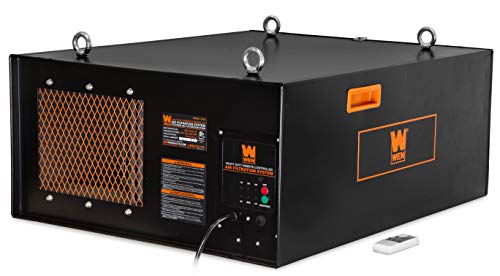
Dust is the cost people forget to budget. A table saw and a miter saw make a lot of fine dust that stays in the air long after the cut, and a garage attached to a house sends it indoors. The two tools that fix this are a source-capture collector and an ambient air filter, and they do different jobs: the collector pulls chips and dust at the machine, the hanging filter cleans what escapes.
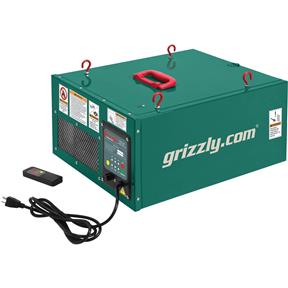
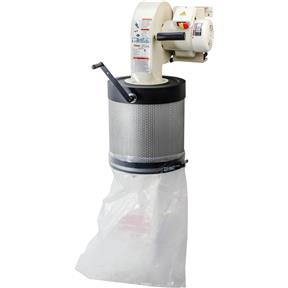
A wall-mount dust collector, like the Grizzly G0785 with a canister filter, takes the footprint off the floor, which matters in a one-car garage. A hanging air filter, like the G0738 with its 1 micron filter and three speeds, cleans the room air between cuts. For anything that makes fine dust indoors, the DEWALT DWV010 dust extractor review covers the portable, hose-and-tool route.
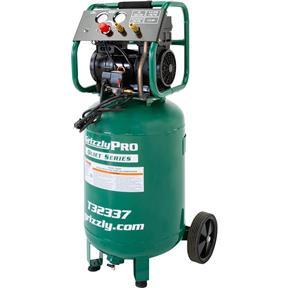
Air for nailers, blow guns and spray finishing comes from a compressor. A quiet oil-free 20-gallon unit, such as the Grizzly T32337, is the sensible garage choice because a quiet unit does not clear the house when it cycles. Compressors also draw heavy startup current, which is one more reason the subpanel comes first.
To size a collector for your machines, use WorkshopCalc's dust collection CFM calculator, and see its best air filtration systems guide for ambient air cleaners.
To see the whole shop on the floor before you spend, GarageShopCalc has scaled garage shop layouts for six garage sizes, and its workshop amps calculator totals the machines into a subpanel size for your electrician to confirm.
| Tier | What you add | What it solves |
|---|---|---|
| Entry | Shop vacuum with a fine-dust filter on each tool | Chips and visible dust at the tool |
| Step up | Hanging air filter, three-speed | Fine dust left in the room air |
| Pro | Wall-mount dust collector plus hanging air filter | Chips at the source and fine dust overhead |
| Air | Quiet oil-free 20-gallon compressor | Nailers, tire inflation, blow-off |
Stage 5: The tools, in three tiers
Tool spending is where garage shops go wrong, because they buy the biggest tool first. The better order is to buy what the next project needs, in a tier that matches the room and the power you have. Three tiers cover almost every garage.
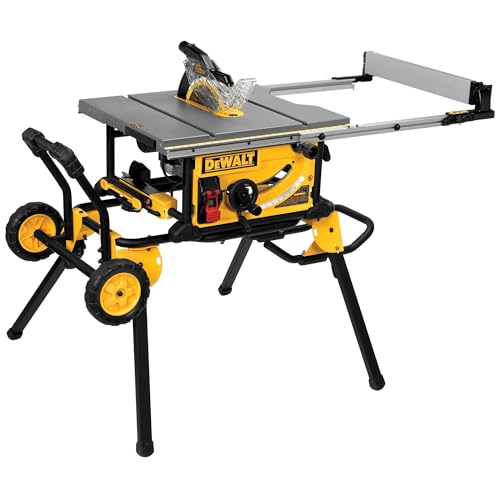
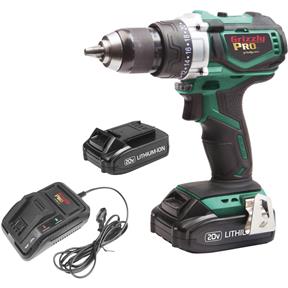
Tier one is the weekend shop: a cordless drill kit, a circular saw, clamps and a small bench. It handles shelves, repairs and furniture assembly. Tier two is the build-ready shop: a benchtop table saw and a miter saw on a stand, with a shop vacuum. That pair is the core of most deck, trim and built-in projects, and it is what our DEWALT DWE7491RS table saw review and DEWALT DWS779 miter saw review cover from the Amazon side. Tier three is the cabinet shop: a hybrid or cabinet saw, a wall-mount collector and a hanging filter, which assumes the subpanel and a 240V circuit are already in.
For the saw decision in detail, see our guide to the best table saw and miter saw for a garage shop and the comparison of a jobsite table saw vs a hybrid or cabinet saw. If you are buying everything in order from scratch, the DIY starter pack lists the tools in the order to buy them.
| Tier | Core tools | Power needed |
|---|---|---|
| Weekend shop | Cordless drill kit, circular saw, clamps, hand tools | Standard 120V outlets |
| Build-ready shop | Benchtop table saw, sliding miter saw, shop vacuum, quiet compressor | Two or more 20 amp circuits |
| Cabinet shop | Hybrid or cabinet saw, wall-mount collector, hanging air filter | 240V circuit and a subpanel |
What the whole shop costs, by garage size
Put the stages together and the totals separate cleanly. The infrastructure (electrical, lighting, bench) is the part that scales with the garage and is mostly labor. The tools scale with your ambition, not your square footage. A one-car garage can be a complete, very capable shop without a 240V circuit; a two-car garage is where the 240V circuit and a stationary saw pay off.
Treat the infrastructure bands below as the floor of the project and add tools in the tier you choose. If the electrician finds that the main panel cannot feed a subpanel, the panel upgrade moves from the "if needed" line to the top of the list and the rest of the plan waits for it.
| Stage | One-car low | One-car high | Two-car low | Two-car high |
|---|---|---|---|---|
| Electrical: outlets, subpanel, one 240V circuit | $1,000 | $4,000 | $1,400 | $6,000 |
| Lighting | $150 | $900 | $600 | $1,500 |
| Workbench and storage | Tier-based | Tier-based | Tier-based | Tier-based |
| Dust and air | Tier-based | Tier-based | Tier-based | Tier-based |
| Permits and inspection | $75 | $400 | $75 | $400 |
Where the money goes wrong
The most common mistake is buying a stationary tool before the power exists for it. A 3 HP cabinet saw that arrives before the 240V circuit sits in its crate for weeks, and the electrician then finds the main panel needs work. The second is skipping dust control until the first big cut fills the garage and drifts into the house. The third is buying every tool at the top tier on day one, when the first project would have been fine with the middle tier.
The fix for all three is the same: do the stages in order, buy the next tool when the next project needs it, and let the infrastructure run slightly ahead of the tools. A shop that has the power, the light and the bench in place can take almost any tool you add later.
- Electrical first. Never buy a 240V tool before the circuit exists.
- Light second. It is cheap and it makes every later step safer.
- Bench third. Everything else gets used on it.
- Dust fourth, before the big saws, not after.
- Tools last, in tiers, one project at a time.